Using GitHub Codespaces for AL development
From an DevOps and develop experience (DX) point of view, the announcement that the Visual Studio Code extension for AL development now runs on linux (src) was super exciting for me. At first glance this is not a great thing as most of us have little contact with ubuntu and its ilk in our professional lives. But the Linux support is the basis for remote development and GitHub Codespaces.
What is a codespace?
A codespace is a development environment that's hosted in the cloud. You can customize your project for GitHub Codespaces by committing configuration files to your repository (often known as Configuration-as-Code), which creates a repeatable codespace configuration for all users of your project.
The highlight is that we can make ourselves completely independent of local infrastructure, if we don't have to run any development containers locally. This means that we can (but don't have to) develop completely in the browser and have close to none requirements on the local system of the developer. If you take it to the extreme, you could even develop on your smartphone (when docking station, monitor and input devices provided).
Let's take a look Testing GitHub Codespaces for AL development is not as hard as it seems at first. The Prerequisites are quite simple:
- GitHub Account.
- A BC environment which is accessible from the internet.
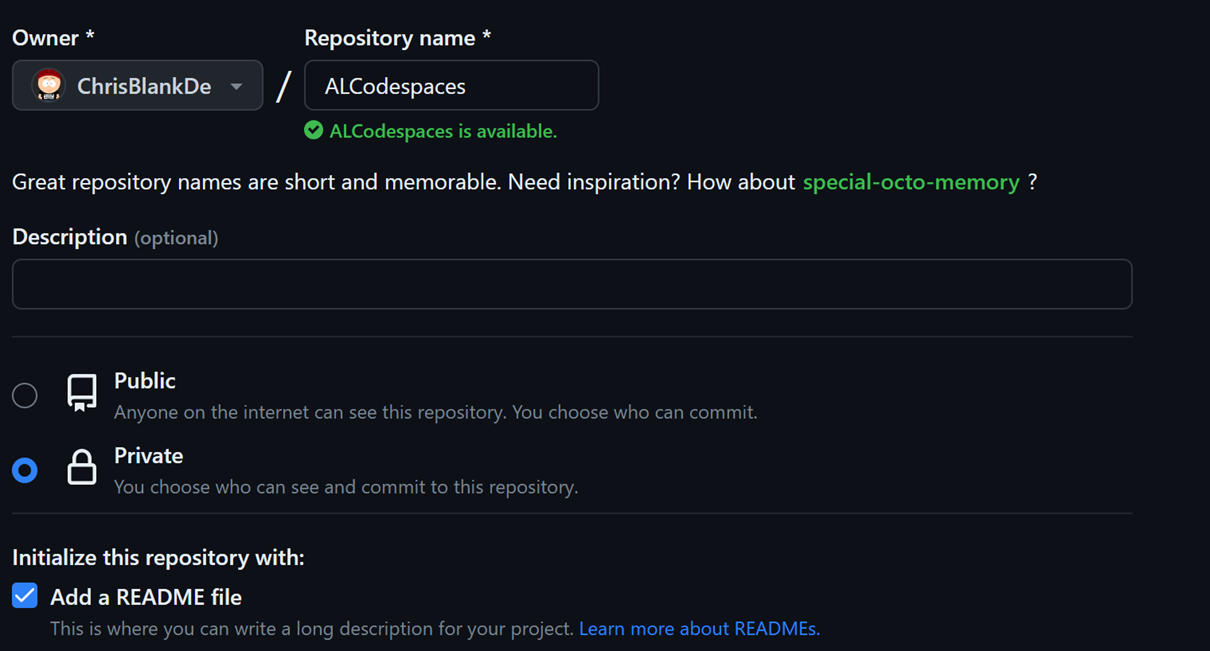
We create a new repository in GitHub.
Then we start a new Codespace.

A new tab opens and an empty Codespace is created. But of course, we don't want to work in an empty Codespace. We want more. So we first set up some configuration files for Dev Container.
To make it easy, we choose the following configurations:
- Create a new Configuration...
- Container Configuration Template: PowerShell. Here you could also choose a simple Ubuntu but PowerShell is always helpful. 😉.
- Additional Features: none
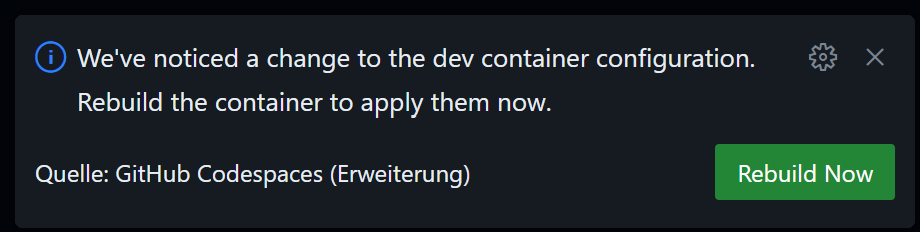
A new configuration file is created directly and Visual Studio Code asks us right away if we want to apply this new configuration (which we do not do yet).
To be able to develop AL sensibly we still adjust the configuration. We add our favorite extensions to the extensions to be installed: "ms-dynamics-smb.al", "waldo.crs-al-language-extension", "andrzejzwierzchowski.al-code-outline". The finished configuration file will look something like this:
// For format details, see https://aka.ms/devcontainer.json. For config options, see the
// README at: https://github.com/devcontainers/templates/tree/main/src/powershell
{
 "name": "PowerShell",
  // Or use a Dockerfile or Docker Compose file. More info: https://containers.dev/guide/dockerfile
  "image": "mcr.microsoft.com/powershell:lts-debian-11",
  "features": {
    "ghcr.io/devcontainers/features/common-utils:2": {
      "installZsh": "true",
      "username": "vscode",
      "upgradePackages": "false",
      "nonFreePackages": "true"
    }
  },

  "postCreateCommand": "sudo chsh vscode -s \"$(which pwsh)\"",

  // Configure tool-specific properties.
  "customizations": {
    // Configure properties specific to VS Code.
    "vscode": {
      // Set *default* container specific settings.json values on container create.
      "settings": {
        "terminal.integrated.defaultProfile.linux": "pwsh"
      },

      // Add the IDs of extensions you want installed when the container is created.
      "extensions": [
        "ms-vscode.powershell",
        "ms-dynamics-smb.al",
        "waldo.crs-al-language-extension",
        "andrzejzwierzchowski.al-code-outline"
      ]
    }
  }

  // Use 'forwardPorts' to make a list of ports inside the container available locally.
  // "forwardPorts": [],

  // Uncomment to connect as root instead. More info: https://aka.ms/dev-containers-non-root.
  // "remoteUser": "root"
}
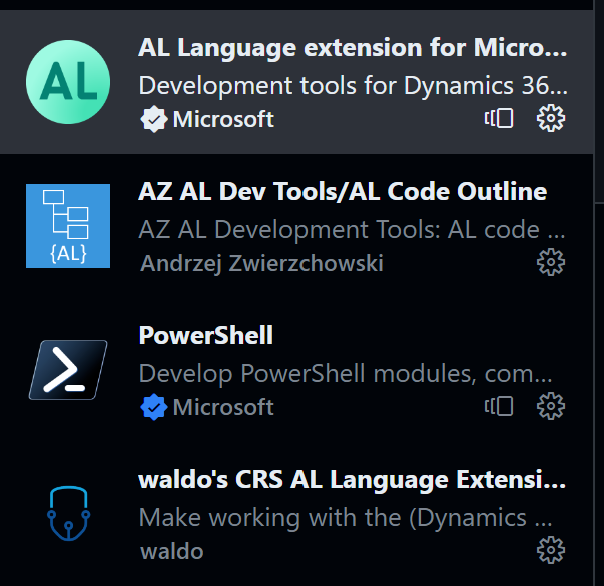
Now let's recreate the Codespace:

This takes about a minute. After the environment is up and running again, we can see that our extensions are installed:
Now we can also run AL:Go! and start developing a new app. In the launch.json we simply reference our Cloud Environment.
Everything else is trival, as one of my favorite professors at university used to say.